No-Fail Easy Fudge: Your Shortcut to Decadent Homemade Treats
Imagine a dessert that's intensely rich, unbelievably smooth, and screams luxury, yet comes together with minimal effort and just a handful of ingredients. Sounds like a dream, right? This isn't a fantasy; it's the reality of easy fudge. Often perceived as a complicated confection requiring candy thermometers and precise timing, homemade fudge can actually be one of the most straightforward and rewarding treats you ever make. Forget the hustle and bustle of complicated holiday baking or the endless search for the perfect gift – with our no-fail easy fudge recipe, you're just moments away from creating culinary magic.
Whether you're a complete novice in the kitchen or a seasoned baker looking for a quick win, this recipe is designed to deliver perfect results every single time. We're talking silky smooth, melt-in-your-mouth chocolate bliss that will have everyone asking for your secret. And the best part? It takes under 10 minutes of active prep time before chilling. Let's dive into the simple art of transforming three humble ingredients into an extraordinary decadent treat!
The Essential Trio: Unlocking Easy Fudge Perfection
The secret to truly no-fail fudge lies in its simplicity and the power of its core ingredients. While some recipes might call for marshmallows, butter, or even a candy thermometer, our streamlined approach focuses on a foundational trio (plus a pinch of salt!) that guarantees a perfect texture and rich flavor without any fuss. Quality matters here, so choose your components wisely.
1. High-Quality Chocolate: The Flavor Foundation
Since chocolate is the star of the show, its quality directly impacts your fudge's final taste and texture. You have the flexibility to choose:
- Chocolate Chips: These are incredibly convenient. Semi-sweet chocolate chips are a popular choice, offering a balanced sweetness that many find appealing. For a darker, more intense flavor, opt for bittersweet chips. Milk chocolate chips will yield a sweeter, creamier fudge.
- Baking Chocolate Bars: If you prefer the nuanced flavor of a specific brand or cocoa percentage, coarsely chopped baking chocolate bars work wonderfully. Just ensure they are finely chopped enough to melt evenly.
Feel free to experiment with your favorite type – dark, semi-sweet, milk, or even a combination. The choice will define your fudge's character.
2. Sweetened Condensed Milk: The Unsung Hero
This is arguably the most critical ingredient, acting as the base, sweetener, and binder that gives fudge its signature smooth, dense texture. There is absolutely no substituting sweetened condensed milk for evaporated milk. They are distinctly different products, and using evaporated milk will lead to a grainy, liquid mess instead of firm, smooth fudge. Sweetened condensed milk is non-negotiable for this recipe's success because its high sugar content and thick consistency are what allow the fudge to set beautifully without additional cooking steps or sugar crystals.
You'll typically need two 14-ounce cans for a standard batch, ensuring enough richness and structure for your decadent squares.
3. A Touch of Butter (Optional, but Recommended for Silkiness)
While often called a "3-ingredient fudge," many successful versions incorporate a small amount of butter. A tablespoon or two of unsalted butter adds an incredible silkiness and richness to the fudge, enhancing its mouthfeel and preventing any potential grittiness. It helps the chocolate melt more smoothly and contributes to that desirable melt-in-your-mouth quality.
4. A Pinch of Salt: The Flavor Balancer
Don't underestimate the power of a tiny pinch of salt! It doesn't make the fudge salty, but rather acts as a crucial counterpoint to the intense sweetness of the condensed milk and chocolate. Just a small dash brings out the chocolate's deep notes and balances the overall flavor profile, elevating your easy fudge from merely sweet to truly sublime.
The No-Fail Process: Heat, Stir, Set!
The beauty of this easy fudge recipe lies in its incredibly simple preparation. You won't need a double boiler, a candy thermometer, or any advanced culinary techniques. It's truly a "heat, stir, and set" affair that even the most timid home cook can master.
Step-by-Step Guide:
- Prepare Your Pan: First, line an 8x8 inch square baking pan with aluminum foil or parchment paper, allowing an overhang on the sides. This creates "handles" that will make it incredibly easy to lift the set fudge out of the pan. Lightly spray the foil or parchment with nonstick cooking spray. Set aside.
- Combine Ingredients: In a heavy-bottomed saucepan, combine your chosen chocolate chips (or chopped baking chocolate), the two cans of sweetened condensed milk, and the optional butter. A heavy saucepan is important as it distributes heat more evenly, reducing the risk of scorching.
- Gentle Melting: Place the saucepan over medium-low heat. This is crucial – you want gentle heat, not high heat, to prevent the chocolate from seizing or burning. Begin stirring constantly with a sturdy wooden spoon or heat-proof spatula. Continue to stir, scraping the bottom and sides of the pan, until the chocolate and butter are completely melted, and the mixture is smooth, glossy, and creamy. This process typically takes about 5-7 minutes. Do NOT walk away from your fudge during this stage! Constant stirring ensures even melting and prevents sticking.
- Add Salt & Stir: Once completely smooth, remove the pan from the heat and stir in your pinch of salt.
- Pour and Chill: Immediately pour the warm fudge mixture into your prepared pan. Use an offset spatula or the back of a spoon to spread it evenly. Allow it to cool slightly at room temperature, then transfer the pan to the refrigerator to chill and set. For the best, firmest results, chilling overnight is recommended. However, if you're in a hurry, you can often get away with 1-2 hours in the freezer.
- Cut and Serve: Once fully set, use the foil or parchment overhangs to lift the fudge block out of the pan. Place it on a cutting board and use a sharp knife (wiping the blade clean between cuts if it gets sticky) to cut it into desired squares.
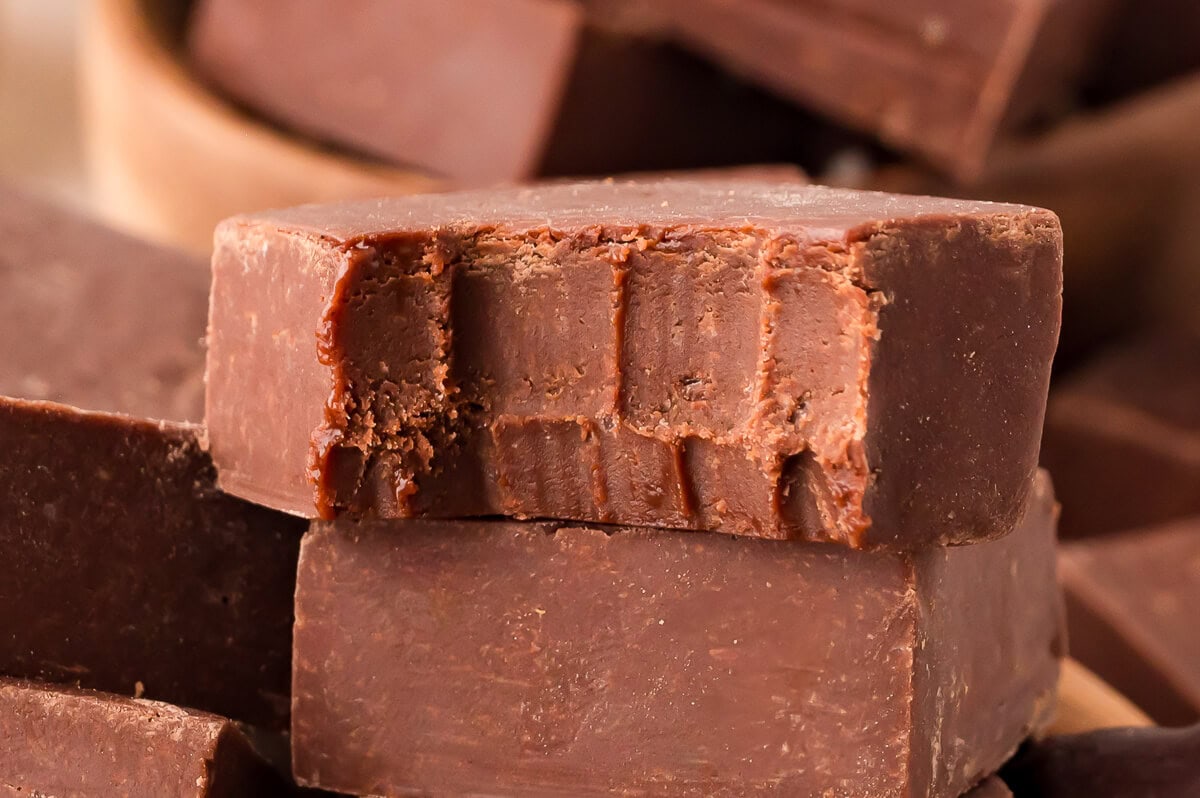
The result? A thick, rich, and intensely chocolaty fudge that's smooth, not gritty, and melts perfectly in your mouth.
Unleash Your Creativity: Easy Fudge Variations
While classic chocolate easy fudge is a masterpiece on its own, this foundational recipe is a fantastic canvas for endless flavor creativity. Once you've mastered the basic technique, the possibilities are truly limitless!
- Nutty Indulgence: Stir in a handful of chopped walnuts, pecans, almonds, or peanuts right after removing the mixture from the heat.
- Fruity & Fun: Add dried cranberries, cherries, or even finely chopped candied orange peel for a burst of flavor and texture.
- Extracts & Spices: Enhance the flavor profile with a teaspoon of vanilla extract (a classic), peppermint extract for mint chocolate fudge, almond extract, or even a pinch of cinnamon or chili powder for a Mexican hot chocolate vibe. Add these after removing from heat.
- Liqueur Lift: For an adult twist, stir in an ounce or two of your favorite liqueur. Bailey's for an Irish cream fudge, Kahlua for coffee notes, Frangelico for hazelnut, or Chambord for raspberry will add sophisticated depth. Add these after the fudge is removed from the heat, stirring until well combined.
- "Rocky Road" Remix: Fold in mini marshmallows and chopped walnuts (or your favorite nut) for a delightful Rocky Road fudge.
- Swirls of Delight: Before pouring into the pan, reserve a small amount of the melted fudge. Swirl in 2-3 tablespoons of softened peanut butter, caramel sauce, or even melted white chocolate into the main batch, then pour and create beautiful patterns with a skewer.
- Toppings Galore: Before chilling, sprinkle the top with sea salt flakes, chopped nuts, sprinkles, or mini chocolate chips for extra visual appeal and flavor.
The key is to add your chosen mix-ins *after* the fudge is removed from the heat but before it cools too much, ensuring they are well incorporated. This preserves their texture and flavor.
Tips for Perfection & Gifting Your Easy Fudge
Achieving perfect easy fudge is well within reach, and a few extra tips can elevate your homemade treats even further, especially if you plan on gifting them.
Achieving the Ideal Texture:
- Don't Rush the Melt: Patience is a virtue when melting the chocolate. Medium-low heat prevents burning and ensures a perfectly smooth, unseized mixture.
- Stir Continuously: This prevents scorching on the bottom of the pan and helps all ingredients combine into a homogenous, velvety mixture.
- Chill Thoroughly: While a quick freeze works, overnight chilling in the refrigerator is best for a firm, easy-to-cut fudge that holds its shape beautifully at room temperature.
- Clean Cuts: For neat squares, use a sharp, non-serrated knife. If the fudge starts sticking to the blade, run it under hot water, wipe it clean, and dry it before making the next cut.
Storage and Shelf Life:
Store your easy fudge in an airtight container at room temperature for up to a week, or in the refrigerator for up to 2-3 weeks. For longer storage, you can freeze fudge in an airtight container for up to 2-3 months. Thaw in the refrigerator or at room temperature before serving.
The Perfect Gift:
Homemade fudge is a fantastic gift for any occasion, especially during the holidays. Its rich flavor and beautiful appearance make it feel incredibly special. To package your fudge:
- Cut into uniform squares or rectangles.
- Place each piece in a mini paper candy cup or wrap individually in wax paper for presentation and to prevent sticking.
- Arrange in a decorative tin, a small box lined with tissue paper, or clear cellophane bags tied with festive ribbon.
- Add a handwritten tag with the flavor (e.g., "Classic Chocolate Fudge," "Rocky Road Fudge") and a simple "Enjoy!"
The time investment for such a delightful, giftable treat is remarkably small, making it a perfect solution when you want to show appreciation without stress.
Conclusion: Your Decadent Journey Starts Now
Gone are the days of intimidated bakers shying away from fudge. This no-fail, easy fudge recipe proves that intensely rich, silky-smooth, and utterly decadent treats are not only achievable but incredibly simple to create. With just three core ingredients and a few minutes of active time, you can whip up batch after batch of holiday bliss, thoughtful gifts, or simply a well-deserved treat for yourself. So, gather your chocolate, grab your sweetened condensed milk, and prepare to transform these humble ingredients into truly extraordinary homemade fudge. Your taste buds (and anyone you share it with) will thank you!
